Thursday, February 9, 2012

DIY Dryer Balls

I've heard that dryer sheets can cause build-up on cloth dipes so I decided to try out felted wool dryer balls. I bought a skein (100 grams) of worsted weight 100% wool at my favorite yarn store, The Knitter's Edge in Bethlehem, for $5. Felted dryer ball sets run about $10+ online. Along with the yarn, you will need a yarn needle and some unwanted pantyhose/nylon stocking. This is a good first project to get the hang of felting yarn. All you need to felt something is yarn made of animal fiber, hot water and a little agitation. The yarn will sort of "melt" together to create a stronger, denser finished product.


Always start your yarn by digging into the center of the ball and pulling out the end from inside.


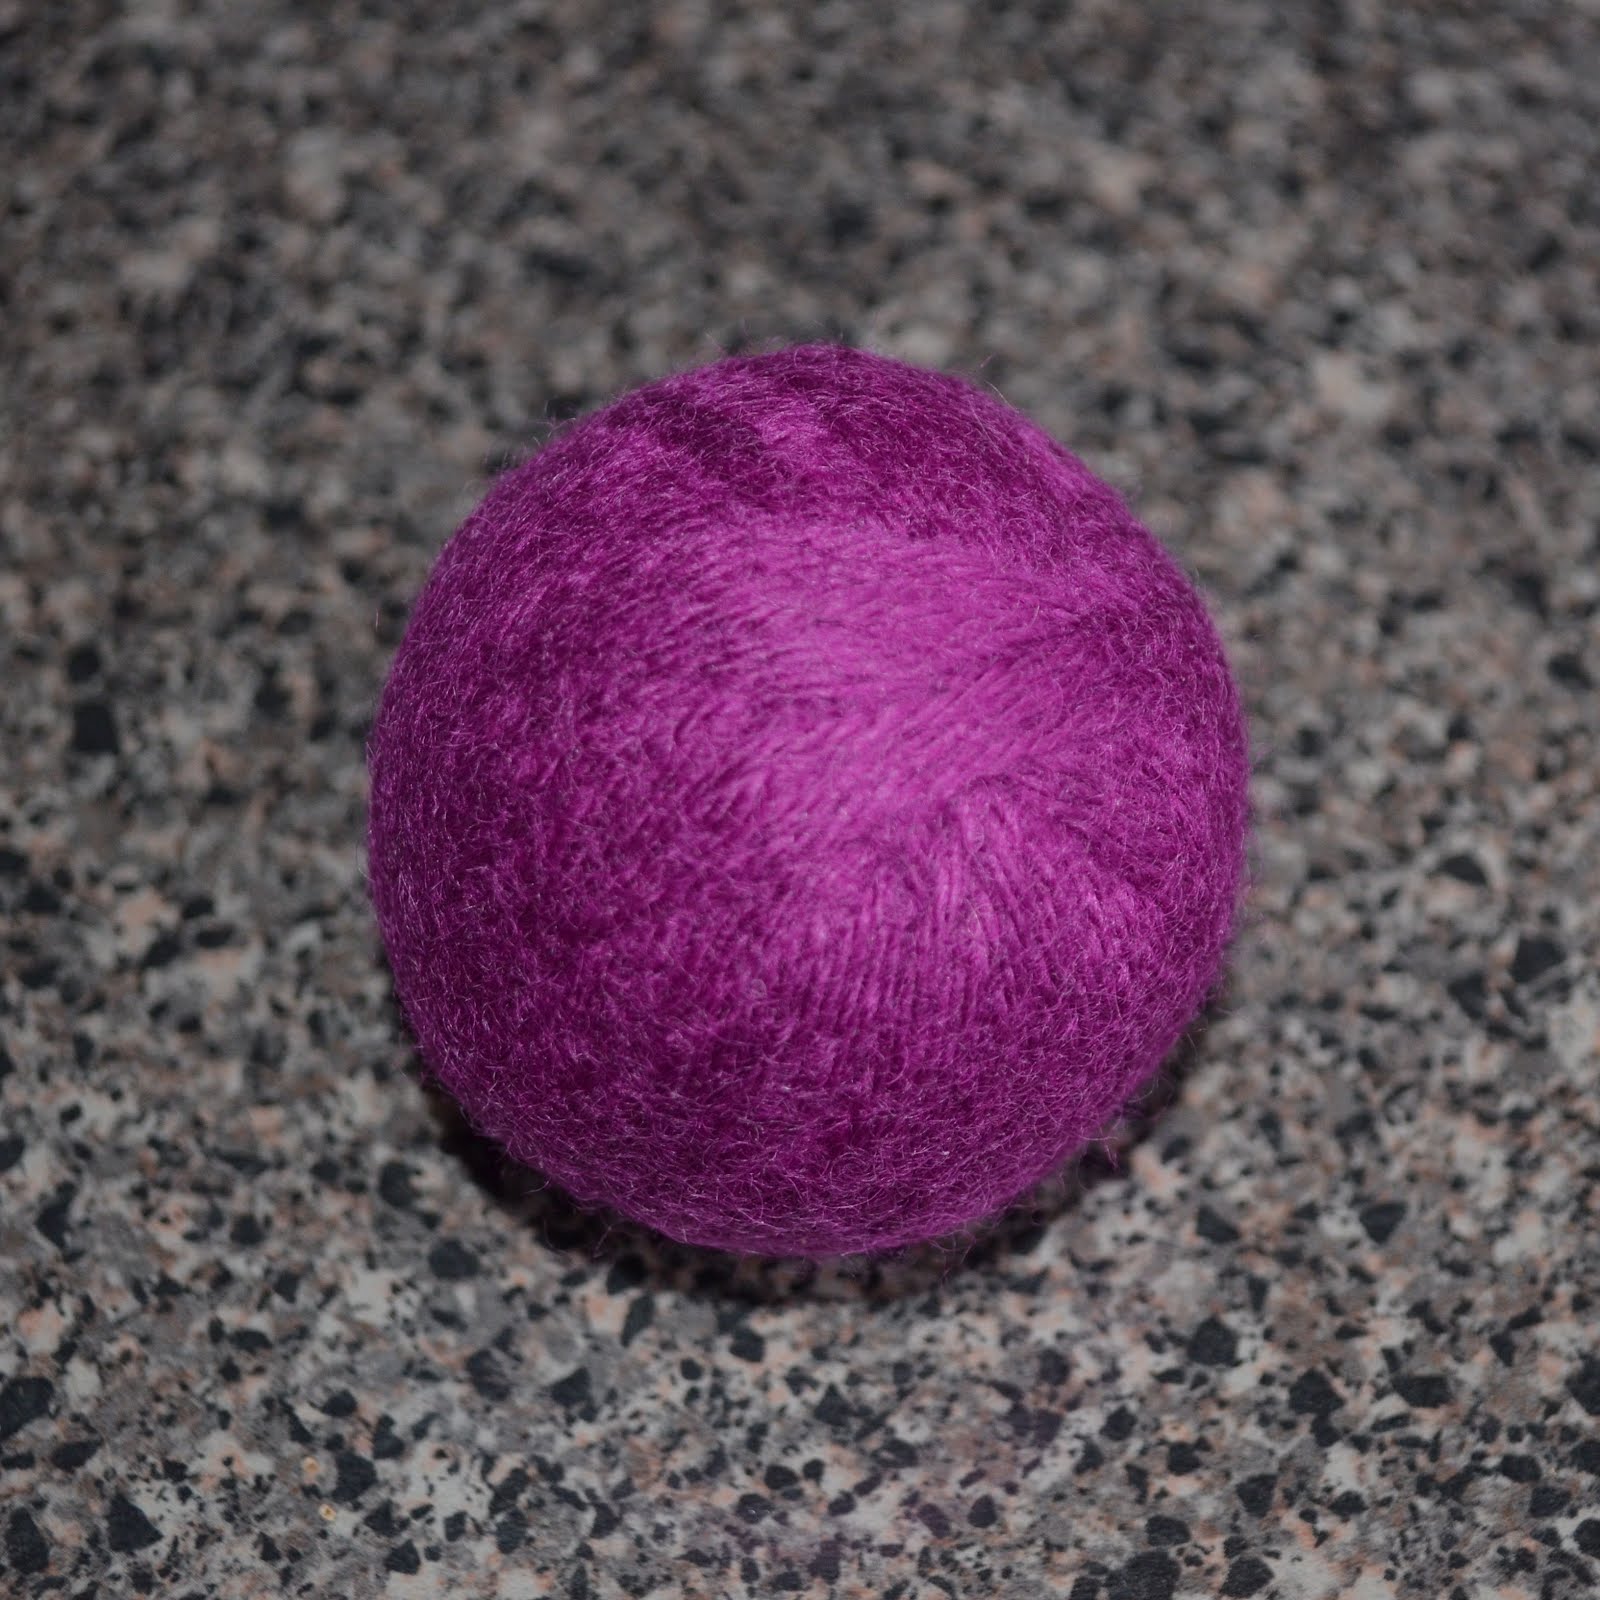
Start your ball by wrapping the yarn around your fingers. Once you have a good bit wrapped, pop it off and wrap the rest until your ball is about the size of a tennis ball.


Cut your yarn and use a yarn needle to bury the end inside the ball.


Place the ball inside of a nylon stocking and tie it off. I ran it through the quick wash cycle on HOT twice to felt. This is a good time to run a load of dish towels as part of the felting process includes agitating your project.


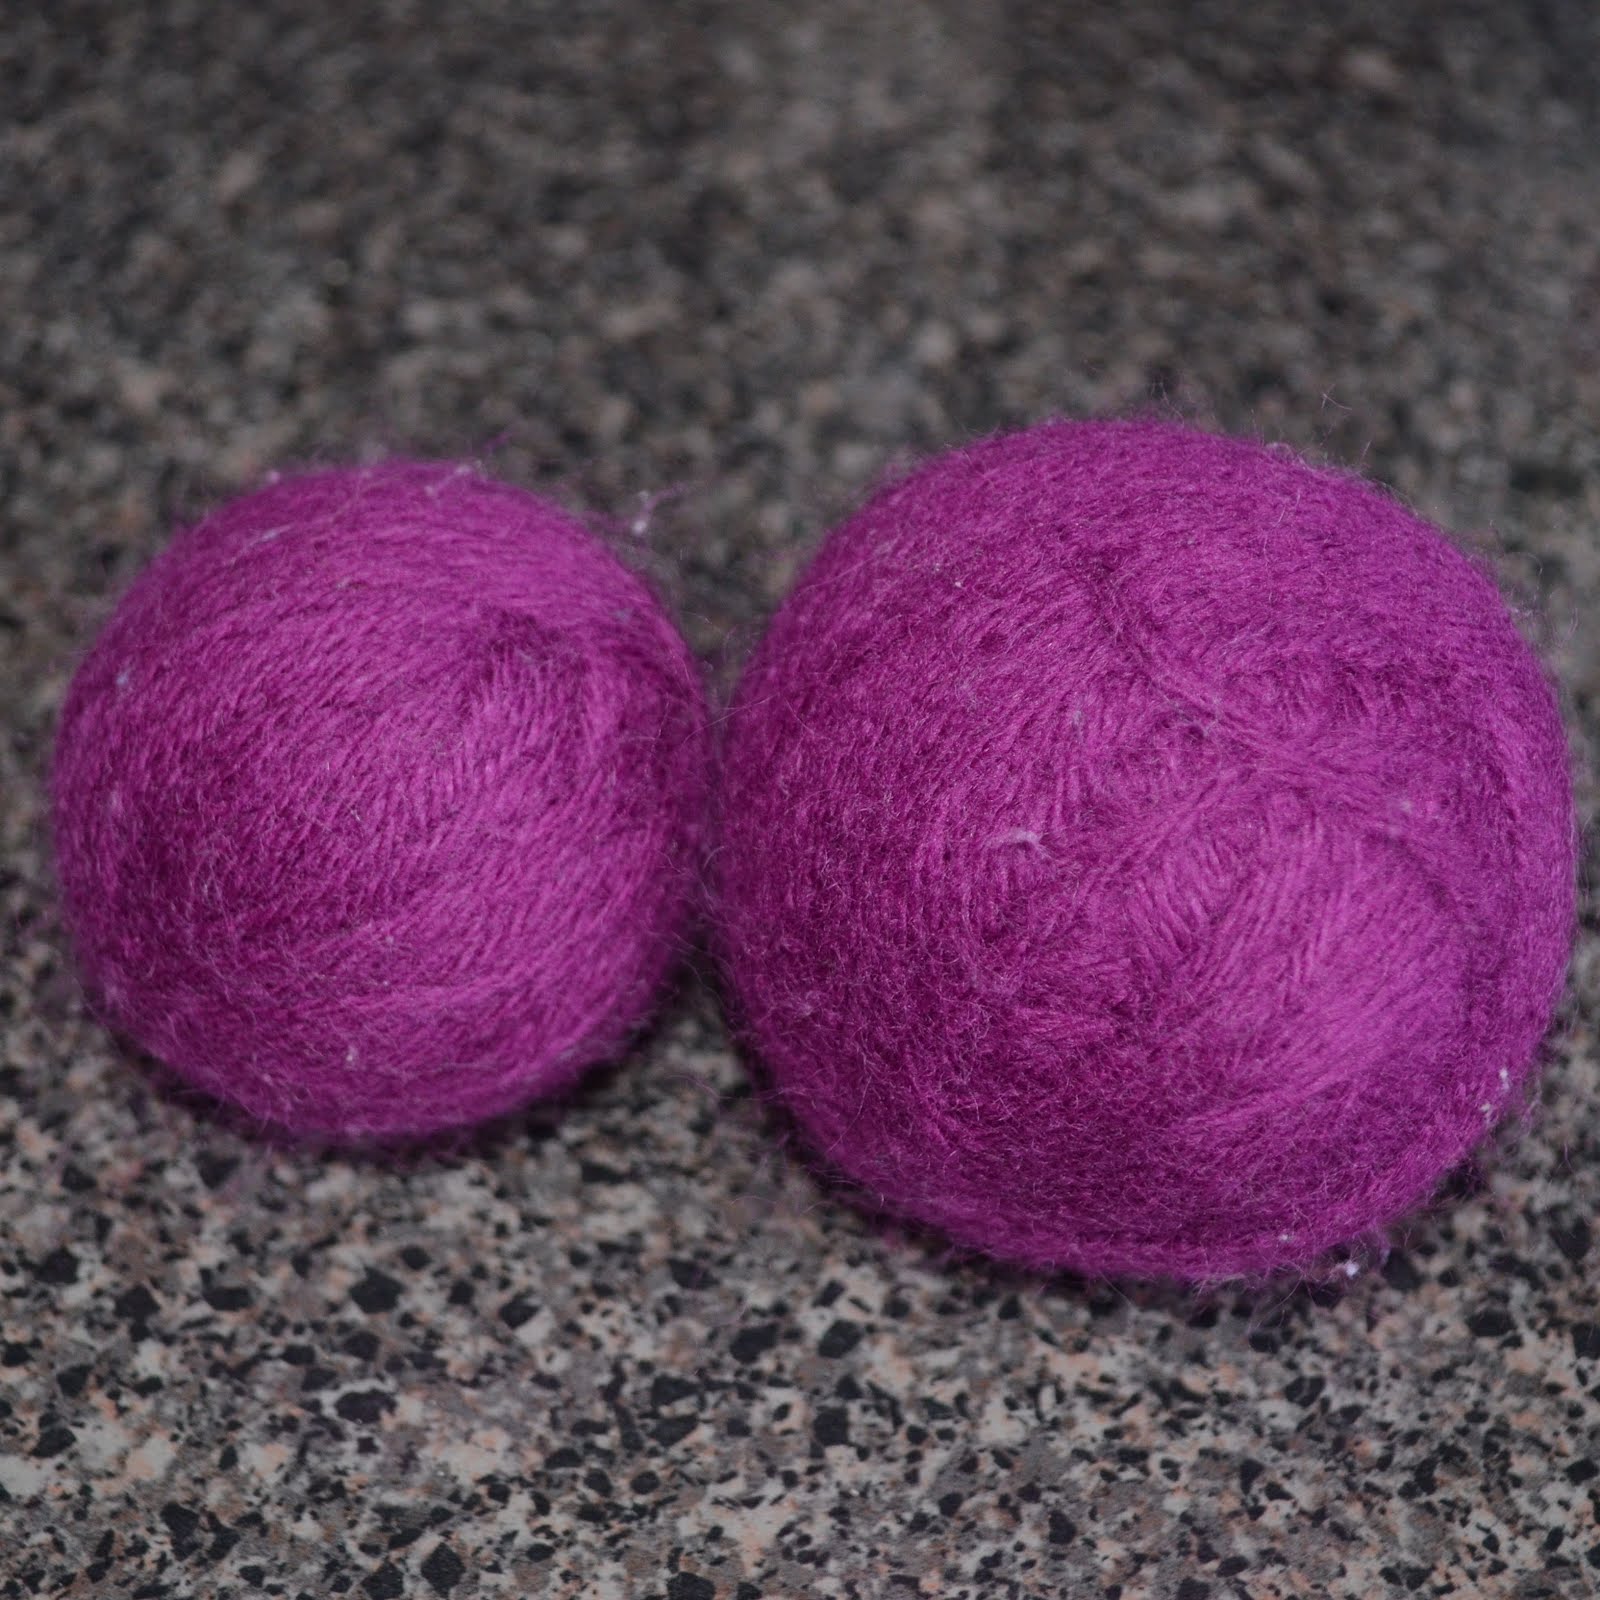
The felted ball came out a little smaller. Beware it will smell like a wet sheep but a few times in the dryer will take care of that.


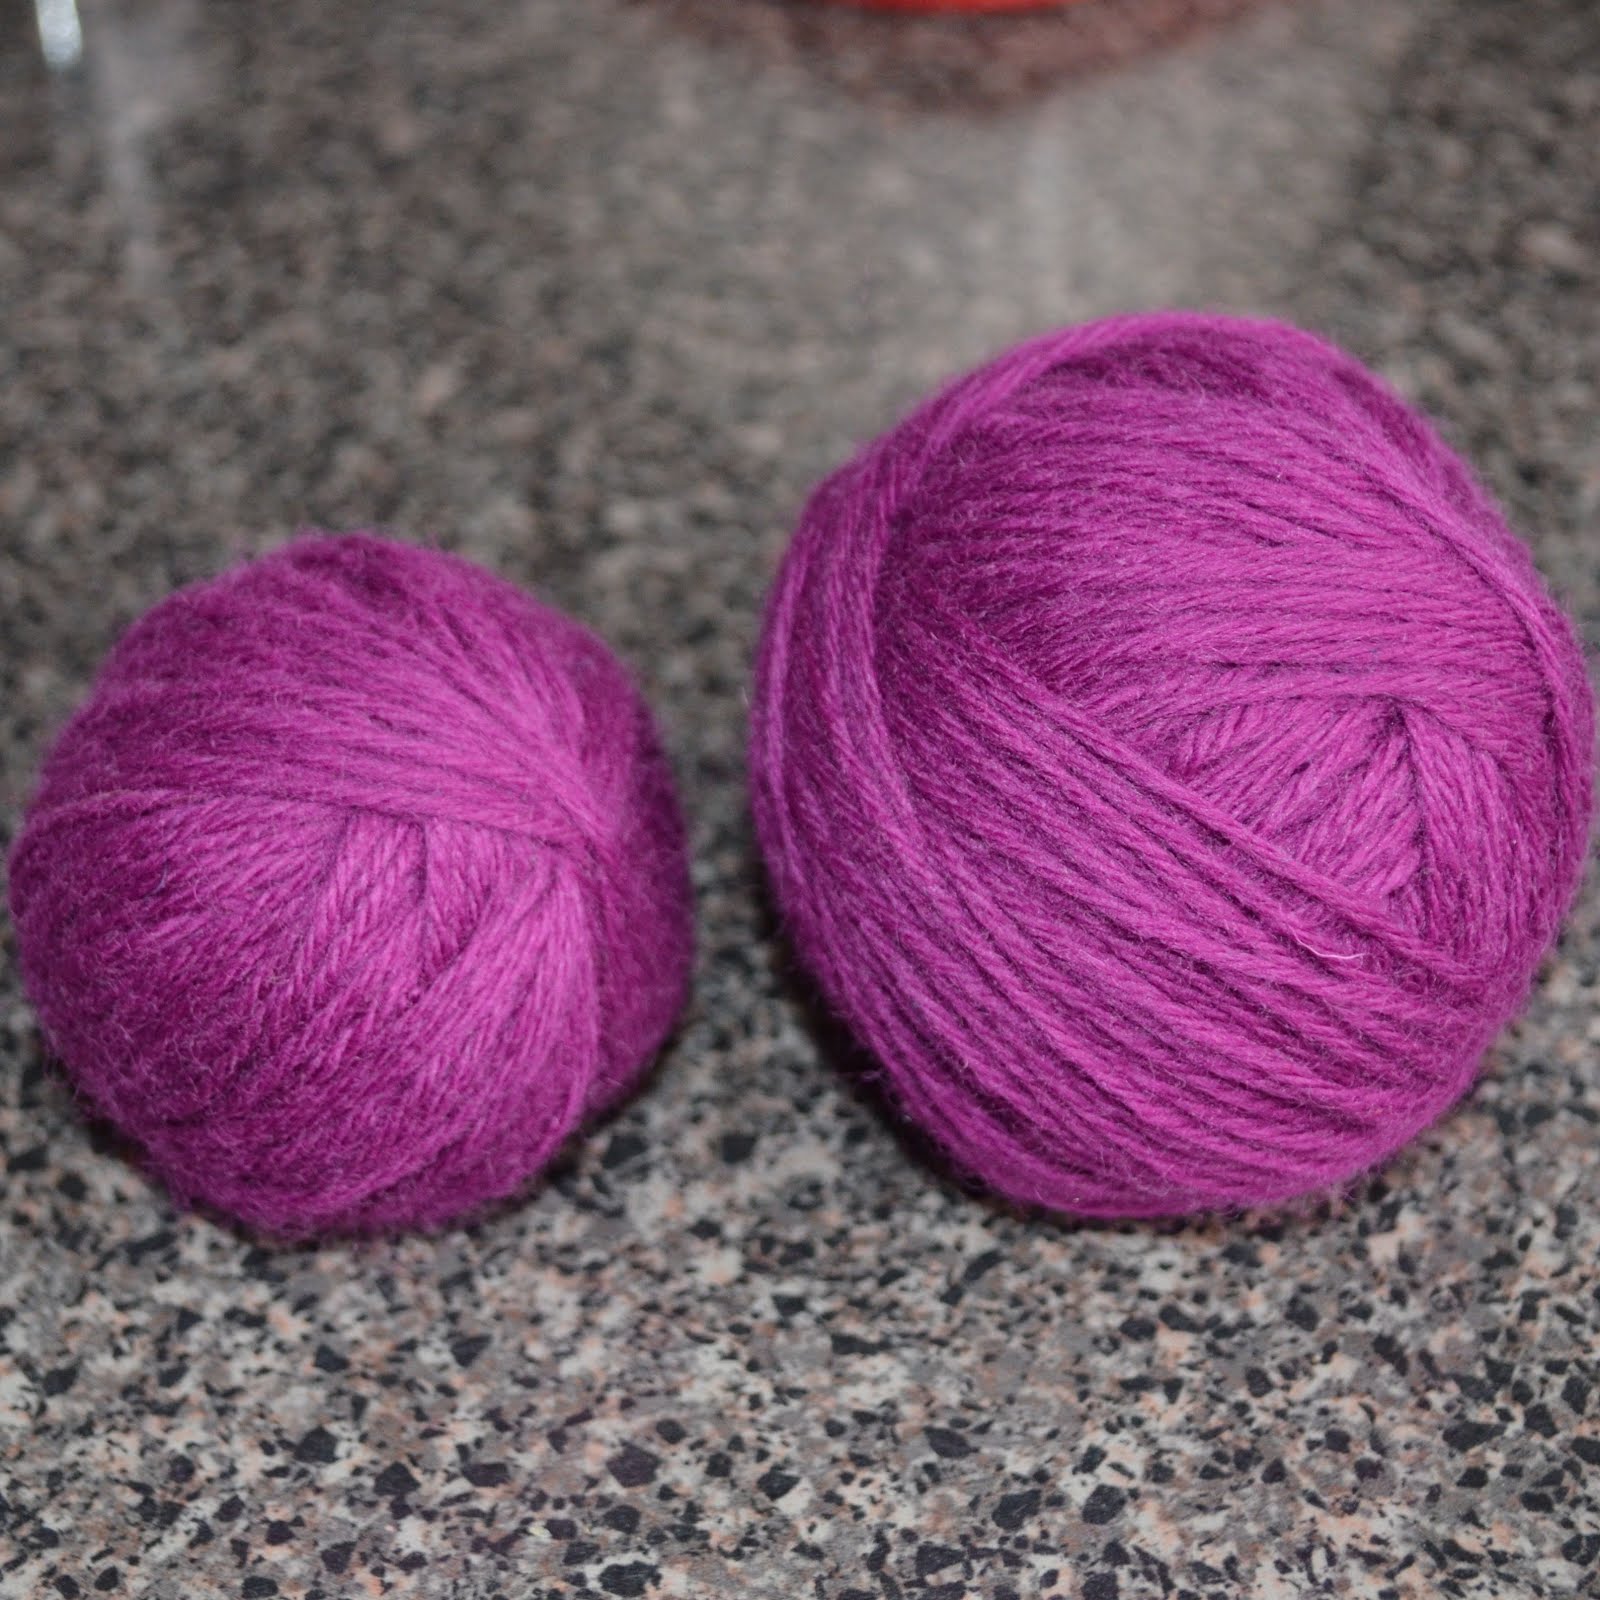
You can make the ball a little larger by wrapping more yarn around it and felt again. Use the leftover yarn to make another tennis ball sized dryer ball and repeat the stocking and felting process. My end result was two balls of different sizes.

Before felting.


After felting and drying.


I used them in place of dryer sheets in a load of small blankets. I did notice a lot of static but the blankets did dry faster. I'm off to try them on my first load of cloth diapers! Have you made them or used them? What did you think?

Tuesday, February 7, 2012

a Green Pet

Every day I try to think of ways to “green” our home for the small two-legged people in our house. But what about our little four-legged family member? Our six-year-old Beagle mix is my toddler’s proclaimed “best friend”

He spends a lot of time at the living room window “socializing” with the neighbors. I wanted a safe way to clean the smudges so I mixed up a homemade cleaner;

1 cup white vinegar

1 cup water

4 drops of essential oil (I used a blend)

Pour into a spray bottle, give a little shake and it’s good to go!

For our rugs I sprinkle a little baking soda and let it sit for at least fifteen minutes before vacuuming. I think it does a great job of absorbing tough pet odors. As for stinky dog bedding, I’m really looking forward to trying Rockin Green Dog House Rock detergent. http://rockingreensoap.3dcartstores.com/Dog-House-Rock--Pet-Bedding-and-Toy-Detergent_p_92.html I use Rockin Green Hard Rock when washing my cloth diapers and have had great results.

What are your favorite green pet tips?

Wednesday, February 1, 2012

Wipes Solution

I still love my cloth wipes but pre-soaking them in a container didn't work so well (think old dish rag). Instead I mixed up a wipes solution and poured it into a small glass spray bottle (bought in the aromatherapy section of Whole Foods). I spray a little on and have a fresh wipe every time!

I currently have a major obsession with wetbags. I'm selling everything that isn't nailed down on eBay to support my habit. Planet Wise makes a wetbag wipes case that I'm looking forward to getting to try cloth wipes on the go.

Friday, January 27, 2012

Plastic Recycling codes

Every few months I like to purge our accumulated plastics and check their codes. Anything with a 1, 3, 6 or 7 automatically gets tossed. They are the most notoriously dangerous plastics. Household plastics should have a little triangle on the bottom with their designated recycling code inside the triangle. After a purging I like to treat Riley or myself with a new stainless steel water bottle. http://www.plasticfreebottles.com/stainless-steel-bottles.php/Foogo-Thermos/stainless-steel-insulated-sippy-cup


I use the chart here to determine what gets recycled. www.plasticfreebottles.com/pdf/Understanding-Plastic-Codes.pdf

Thursday, January 26, 2012

5 Reasons To Make Cloth Wipes and Tutorial

Five Reasons To Make Cloth Wipes

1. It's a great way to re-purpose flannel receiving blankets
2. It's a simple project for practicing basic sewing skills
3. Cloth wipes with plain water are gentle on delicate bottoms
4. They work easily with cloth diapering and reduce trash
5. They're free

I've been using them only a few hours and I love them! They are great for cleaning messes and I pre-soaked them in a solution of water, coconut oil, gentle baby shampoo and a drop of tea tree oil.

Here's how I made them:

My dog got to a really cute receiving blanket.


He looks a little guilty, huh? He is lucky he is such a sweetheart!


Step 1: Start by cutting up the blanket into 4x8" strips. Fold them over inside-out. To save time, work it like an assembly line, doing one step at a time to all your wipes.


Step 2: Pin together and leaving a 1/4" seam allowance and using a small straight stitch on your machine, sew around the edges of the wipe. Be sure to leave an 1-2" gap so you can turn it right-side out. You can snip the corners to make them sharper when you turn them if you like.


Step 3: Turn your square inside out. You can poke the corners out with a pencil. Pin your gap together for closing in the next step.


Step 4: Use a zigzag stich around the edges to close everything up. Note: some corners might be a little bulky. Lift your sewing foot a bit when going around them.


One small receiving blanket yielded about 16 4x4" wipes. We mixed up a wipes solutions (you could also use plain water) and added it to the wipes in the container.


Wednesday, January 25, 2012

DIY Baby Leggings

Baby leggings are great to keep your Little One warm but at around $12 a pair, they are so expensive. I've been using them almost every day. I pull them down around Ryann's foot to keep her ankles warm where her pants gap and to keep those slippery little socks on. I purchased a pair of women's knee-high socks for $1.50 and got started.


Step 1: Make three cuts on each sock. One right above the heel, one right below the heel and one above the toe. Throw away the heel and toe parts.


Step 2: Take your smaller section (that was the body of the foot) and fold it around itself so the cut edges are lined up together and the pattern is on the outside.


Step 3: Place your folded tube around the bottom of the knee-high and line up all three cut edges. Fold it inside itself leaving a 1" cuff and pin together.


Step 4: Hand sew (backstitch) around. One I finished sewing, I trimmed around the inside.


Step 5: Try them on baby!

Tuesday, January 24, 2012

Freezer Mushrooms


I'm working on reducing our BPA exposure which means eliminating canned foods from our diet. I love adding mushrooms to my cooking and I used to use a small can in soups and sauces. I purchased two containers of fresh mushrooms at the store. After washing, I sauteed them in butter and garlic. Once they cooled I separated them into freezer bags. One container of mushrooms yeilds one cup to freeze. Now I can just pop them into whatever I'm cooking and not worry!